Register the new BMU
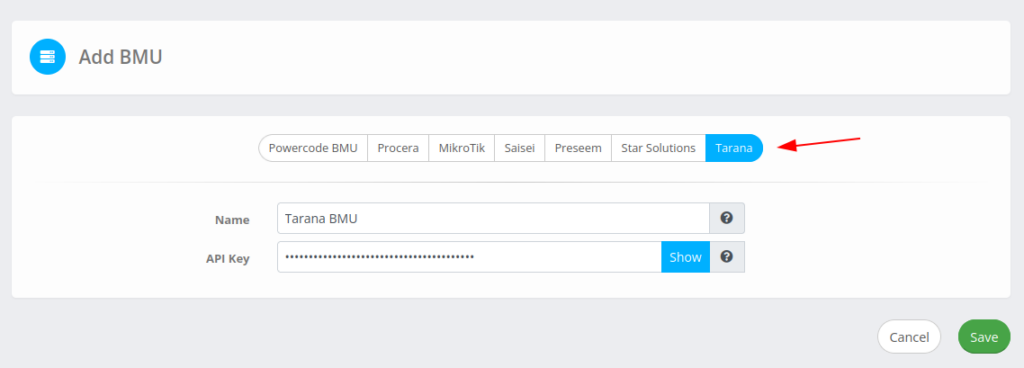
Go to “Network → BMU Overview” and click “Add New BMU” button. Select “Tarana” BMU type provide Name and API Key from Tarana, click “Save” button. You can change API Key or Name at any time.
Register Device Type
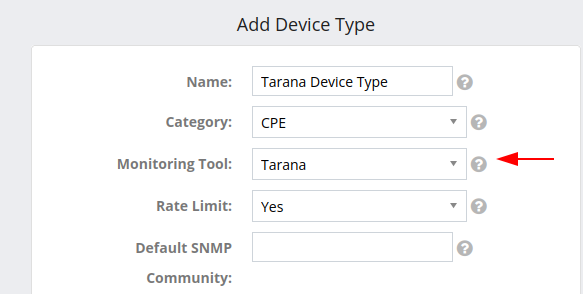
Go to “Network → Devices → Device Type” and click “Add Device Type”. Provide basic information like Name, Category and select “Tarana” Monitoring Tool.
Tarana Configuration
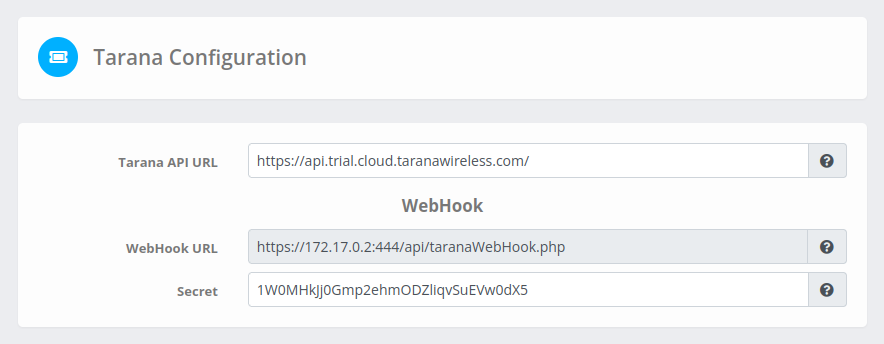
For correct operation and correct change of device statuses, it is necessary to provide a configuration compatible with Taran. In the navigation menu select “Third Party → Tarana Configuration”. Basic WebHook alerts settings are displayed here and the correct WebHook post back URL can be found.
To set it up correctly, you need to have alerts and a WebHook on Taran’s side already configured. On the Taran portal, go “Admin → Webhooks” and click “Add New Webhook”, fill in the name and URL field (Webhook URL can be found on “Third Party → Tarana Configuration” page) and click “Done”. On the next window copy secret key and set up in the “Third Party → Tarana Configuration”.
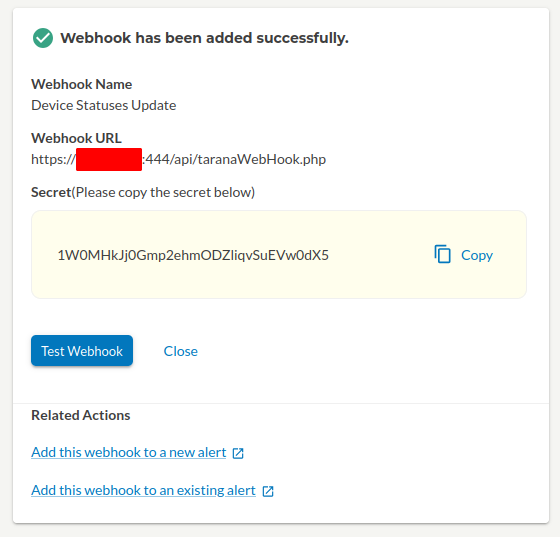
Everything looks like this.
The next step is to create Alerts Configuration on the Tarana side and select “Notification Method” as “Notify via webhooks”, choice WebHook created above and save it.
After that, you can complete the setup:
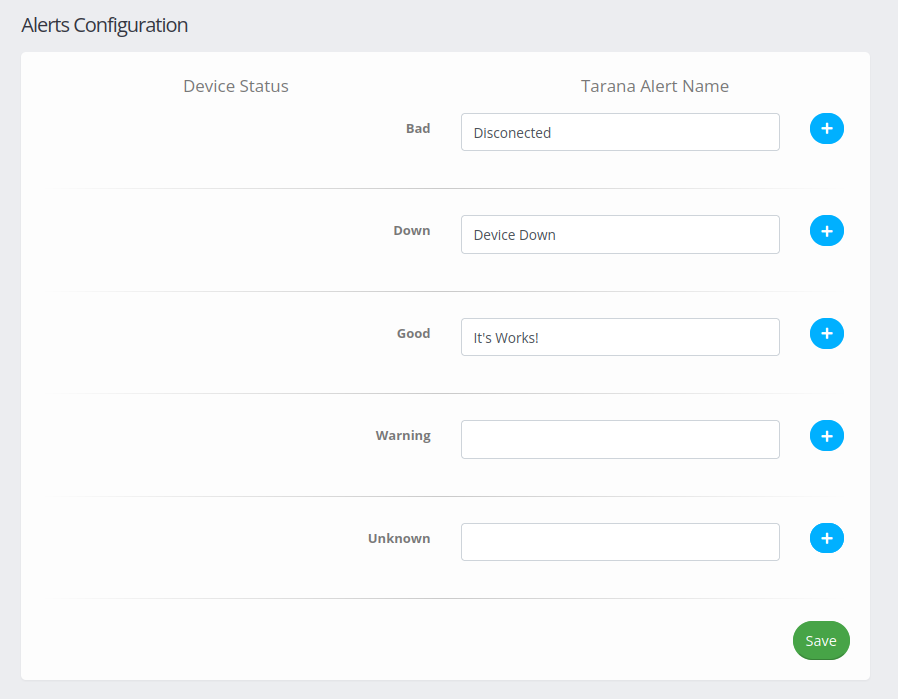
The statuses of the devices are displayed on the left, and on the right Tarana Alert Name. Several alerts can be matched with one status. Setup is complete.
Subscriber Management
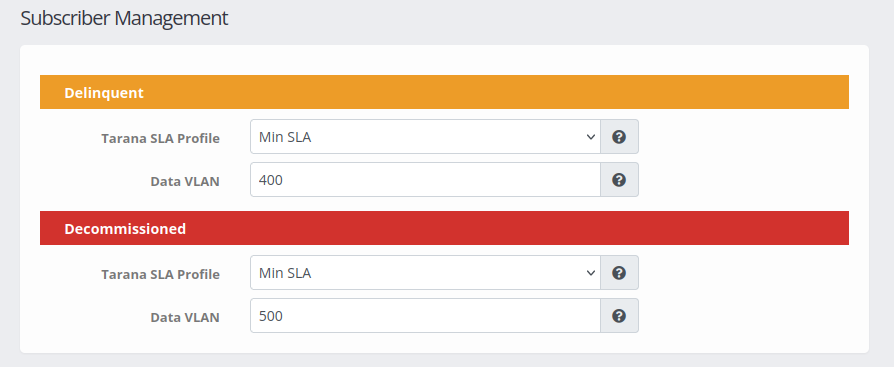
On the configuration page to mange subscriber set Data VLAN value and SLA Profile for Delinquent (Powercode Customer Status is Delinquent) or Decommissioned customer (Any status that’s not Active or Delinquent). In same time when customer status set to Active the SLA Profile and Data VLAN will be set to the value selected in the service belonging to the customer.
Create Equipment
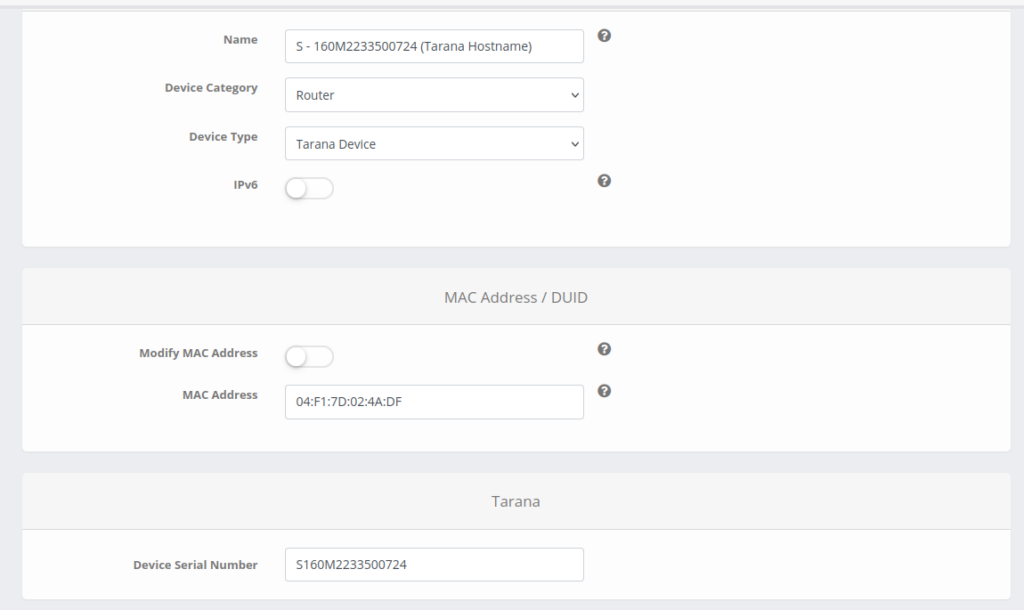
On the Add Equipment page provide Name (It’s equal to Hostname on the Tarana end and will be update by the API), select Device category and Device Type, fill the “MAC Address” and “Serial Number” of the Tarana device.
Update SLA Profile by Service.
On the Add / Edit Service page, go to the tab “Tarana” and Enabled Tarana Service. Select one of the available “SLA Profile”. To set Data VLAN in the field below enter number: “Min (1) – Max (4091)”
and click save.

Device in TCS
To go from the Powercode to the device in TCS, click Serial Number at the top of the Overview page.
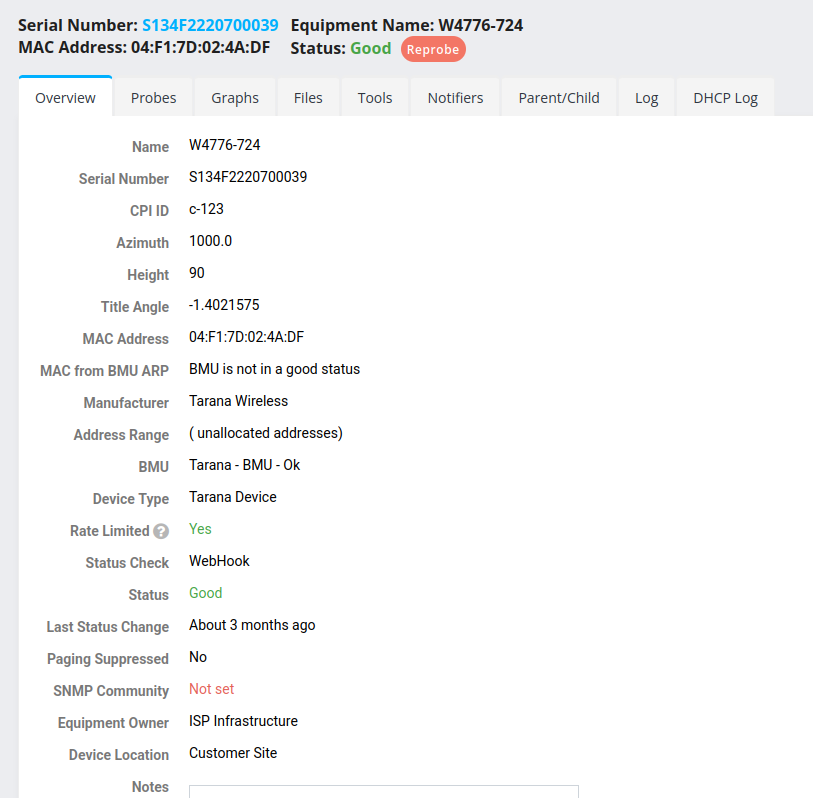
This page also displays additional information about the device, like: Azimuth, Height, Title Angle. The log tab displays logs related to this device only. The general log available in the BMU page.
Customer status change and effect SLA Profile
When changing the customer’s status to Delinquent from Active the SLA Profile will be set to “Min SLA”. In same time when customer status set to Active the SLA Profile will be set to the value selected in the service belonging to the customer.
Installer Mobile View
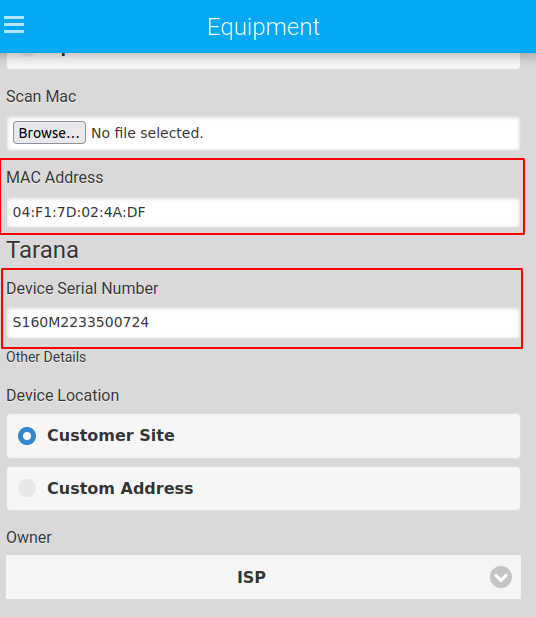
Tarana add / edit device available in the Installer View.
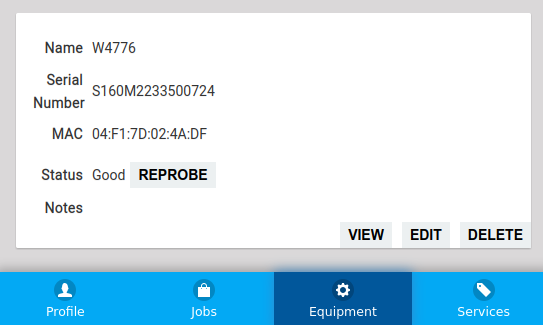
Tarana device information also available on the device list page.
CBRS Devices and User Certification
To associate Tarana CPI ID with user, log in and go to the Profile page. In the Certification tab provide CPI ID and click Save button.

