
The Schedule Live View is where all the scheduled jobs for Powercode are visible in a single view. This easy to use interface allows you to schedule, complete, view and reschedule all your jobs in real time.
All changes saved here are automatically updated for every other logged in user. This means that if you move a job and save it, other people viewing the schedule at the same time will see that job move into the scheduled slot automatically.
There are five main sections of the live view – the map view, time blocks, workbench, standby list and calendar. They are described piece by piece below.
Map View
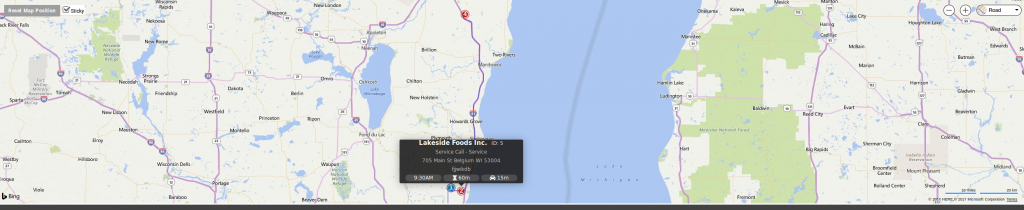
The map view gives you a geographical view of all the jobs for the current day. The jobs are color coded by technician – a unique color is automatically associated with each technician on the schedule. A number is shown in the middle of the pin to denote the order of the jobs. Hovering over a pin shows details on the job – the customer it is scheduled for, the type and template for the job, the address, the notes, the time the job is scheduled for, the amount of time allotted to complete the job and the drive time from the previous job to this job.
If there are multiple jobs for the technician, highlighting a job will also show the recommended driving route from job to job on the map.
Time Blocks

The time blocks section directly below the map shows the timeline of jobs for each technician. In the example shown above, we have two jobs for the technician Administrator. The first job is to complete an install for Rise Marketing, followed by completing a job for Lucas Paul. The darker extension on the left of the Lucas Paul job shows the drive time between them. Highlighting the job shows the same details as if you highlighted the job on the map. You can drag jobs around in this timeblock area to move them to different times or move them to different technicians. Clicking the menu button (to the left of the customer name) presents you with a list of actions you can perform, like editing the job, returning it to the workbench, completing it or deleting it. The actions available depend on the logged in user permissions. When you move jobs within the timeblock area, you must click the Save Changes button located within the calendar menu at the bottom left of the page. This allows you to experiment with moving jobs around and modifying the schedule without committing the changes until you are ready.
Workbench and Stand By List

The workbench is where unscheduled jobs live. Jobs get into the workbench by either being returned to the workbench from the timeblock area, from creating a new scheduled job or from adding it to the workbench via the standby list. To move a job from the workbench to the timeblock area, simply drag it to a slot you want it to fill. Don’t forget to save your changes!
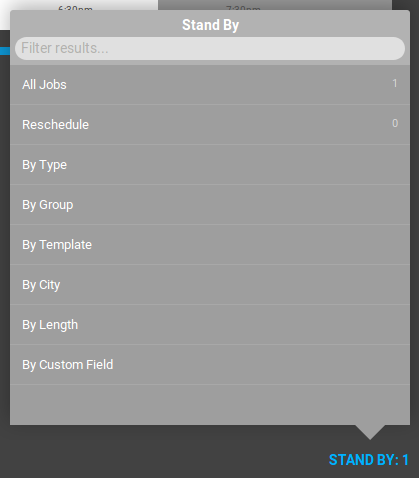
The stand by list is a list of currently unscheduled jobs that have been added to the system. The number next to Stand By on the right of the workbench shows the number of jobs currently in standby. Clicking the button allows you to filter the jobs by a number of criteria. Clicking the arrow next to the job adds it to the workbench.
Calendar
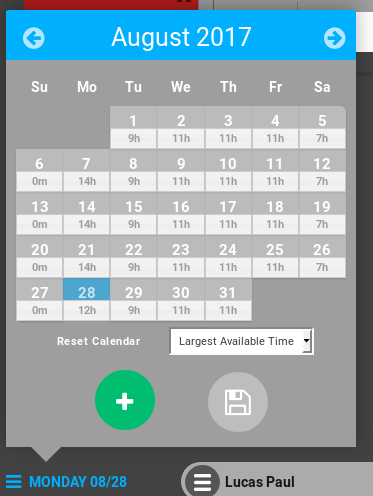
The calendar allows you to move from day to day to schedule jobs on other days. The number below the date is the largest timeblock available on that day for scheduling a job or the amount of time used by jobs on that day. Clicking a day will load the live view for that day. You will need to click the Save Icon before moving to another day if you have made changes to the current day you are viewing. The Plus Icon next to the Save Icon can be used to add a job to the selected day.