Inventory can found under the Inventory link in the Powercode menu bar. Inventory has three tabs: Items, Consumables, and Products that are used to manage individual and bulk Items and Inventory Products respectively.
Manage Inventory
Clicking on the Manage Inventory button near the top of the Inventory page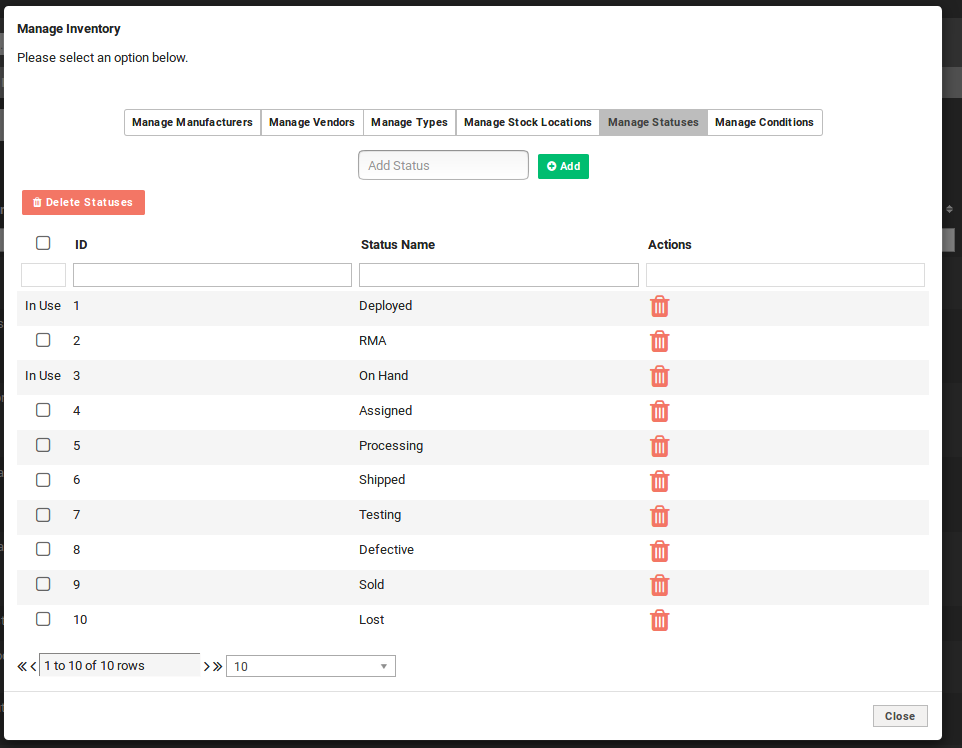
From here you can view and delete Inventory Item, Consumable, and Product attribute options. There is a checkbox to the left of unused items that allows for mass deletion.
Items like Customers and Web Users (also referred to as Staff) are managed elsewhere.
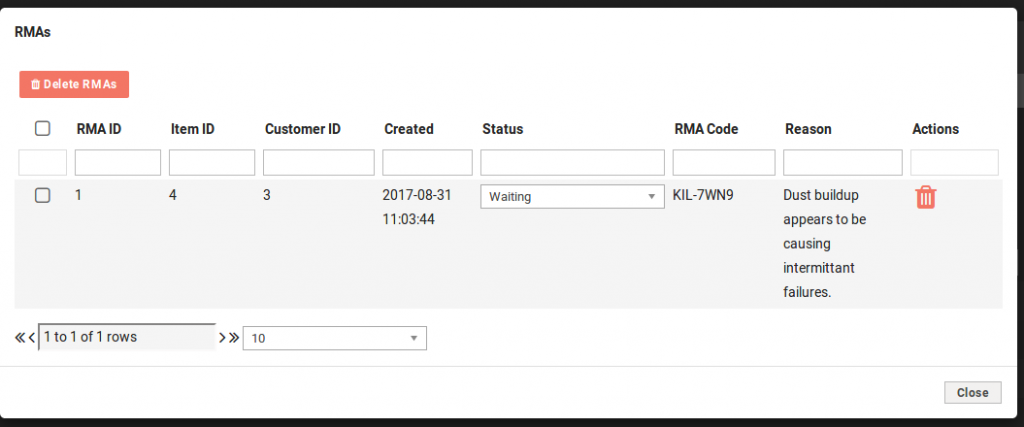
View RMAs
Clicking on the View RMAs button near the top of the Inventory Page brings up a dialog box containing all RMAs.
Once an RMA is created, it can be viewed using the View RMAs button. The system automatically generates an RMA Code for the Item. You can update the Status on the RMA to keep track of its progress, as well as delete it when the process is complete.
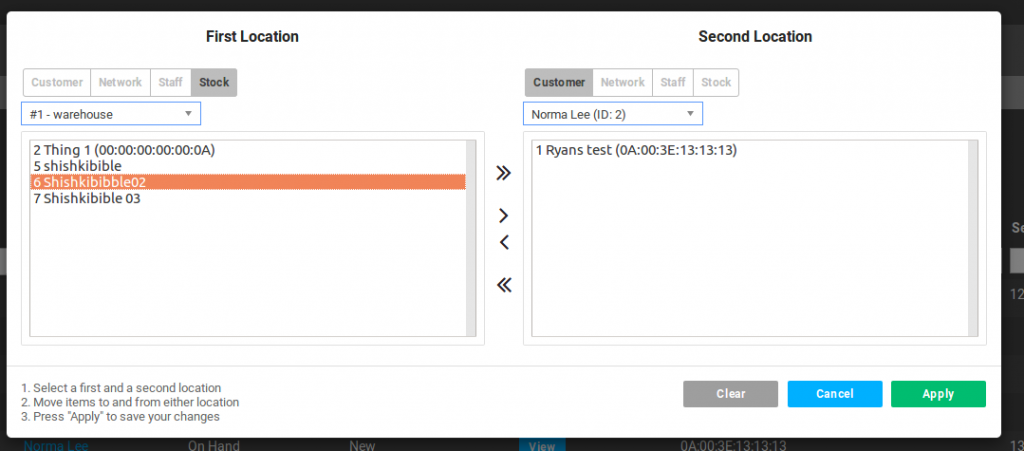
Mass Move Inventory
Clicking the Mass Move Inventory button near the top of the page brings up an interface allowing movements of one or more Inventory Item between two locations in your system.
Choosing a location type and location in either pane will display all inventory at that site, whether that is a Customer account, Network Location, Staff member, or Stock Location. You can highlight Inventory Items from that list and use the single arrow buttons to move the highlighted Items between locations. If you want to move ALL Inventory Items from a location, use the double arrows.
Admin Settings
Currently the only setting available on this dialog box is the ability to change the Min Stock Level email address for alerts. The Min Stock Level notification is sent automatically when Inventory Products reach the set minimum stock level.\
Columns
This button allows you to select which column items you wish to display on Inventory pages.
Items Tab
Add Items
To add an Inventory Item under the Items tab click the green Add Items Button.
Clicking the red lock labeled Bulk Entry Mode will change the icon to green and enter Bulk Entry mode.
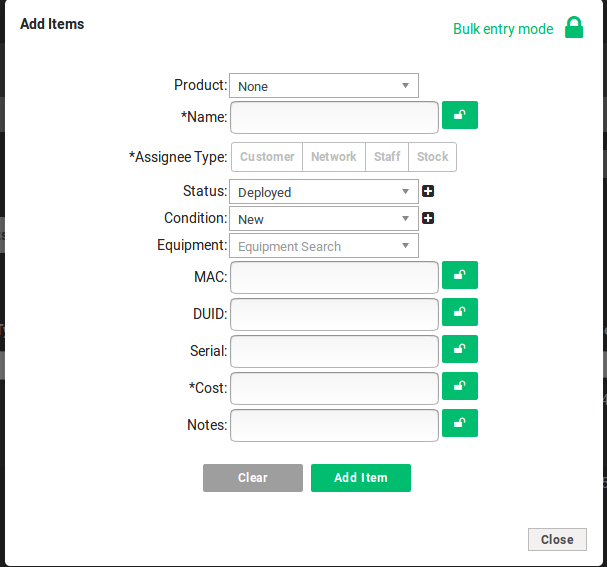
Bulk Entry Mode prevents the dialog box from closing after an Item is entered. The additional locks that appear next to fields in Bulk Entry Mode will save those fields for multiple entries.
Product: The Inventory Item Product. This is not necessary but it allows Powercode to store relevant Product data and monitor and query your Inventory Items by their Product.
Name: If you intend to standardize names with Equipment they must be unique, otherwise this does not matter.
Assignee Type: Sets the item location to Customer, Network, Staff or Stock. Make sure to choose Assignee Type before the following field as the following field will change based on Assignee Type.
Customer/Network Site/Web User/Stock Location: The precise assignment of the Inventory Item.
Status, Condition: Current state of Item. Custom entries can be added with the + icon.
Equipment: This field is used to associate Items in Inventory with Items in Equipment.
MAC: Item MAC address. Must be unique so it can be associated with Equipment.
DUID, Serial, Cost, Notes: These fields offer additional information input for the Inventory Item.
Edit Item
On the Items tab of the Inventory page, select the pencil shaped Edit button to the right of the Item to make changes to a single Item.
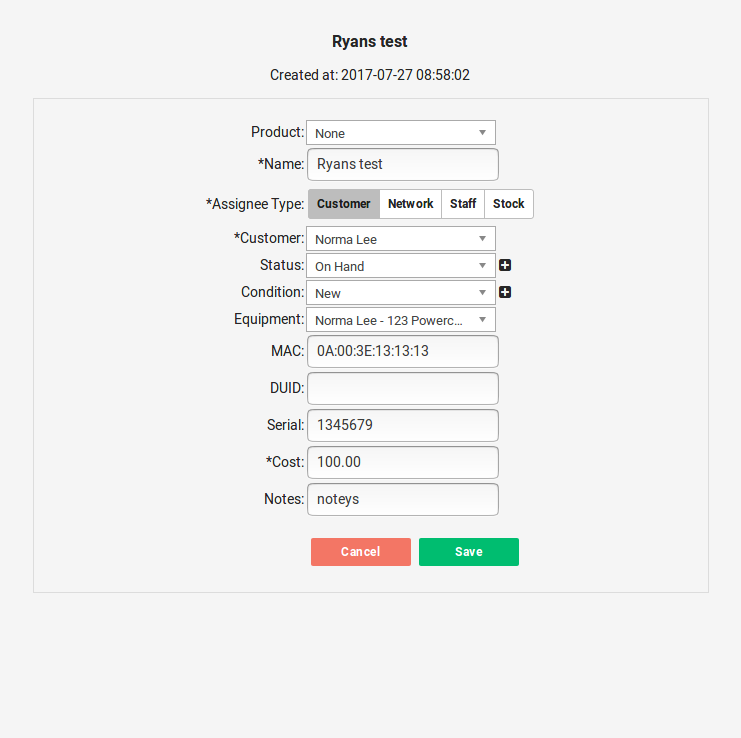
Date Created and the name at the top of the box are unique to existing Items.
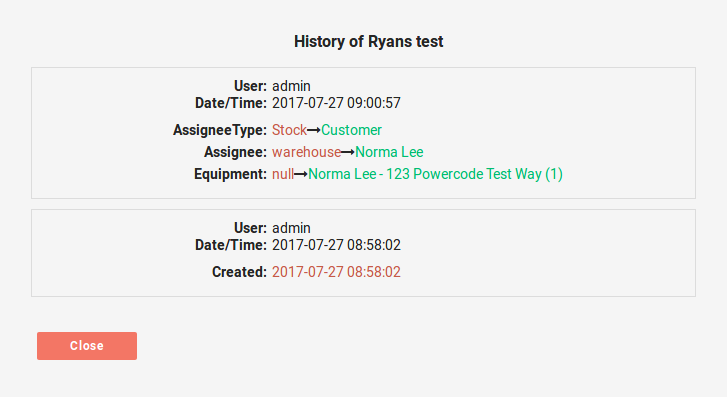
Inventory History Logs
When an Inventory Item is edited in any way, the system will add a log to that Item.
This is viewable by clicking the circular blue Item History Button on the right side of the Inventory page Items tab.
Mass Edit/Delete
You can also edit or delete multiple Items at once using the check boxes on the left side of each entry and then clicking the Edit Items or Delete Items buttons that appear next to the green Add Items button.

Create RMA
When Inventory Items are assigned to a customer, a red RMA button will appear as an option on the right side of the entry. This allows the creation of an RMA for the equipment for the return request.
When clicking on that button, the system will prompt you to enter a Reason for the return merchandise authorization.
Consumables Tab
In order to add Consumables, such as different types of cable, zip ties, or other supplies, we first need to add a Product for the consumable.
Clicking Add Consumable will allow you to choose the Product and Quantity of the consumable you would like to add to Inventory.

To the right of each Consumable in Inventory you can use the + and – icons to add or subtract a number of Consumables. The pencil icon allows you to directly edit the number of a consumable in Inventory. The graph icon will display a Consumable History graph to help you track trends in use over time.
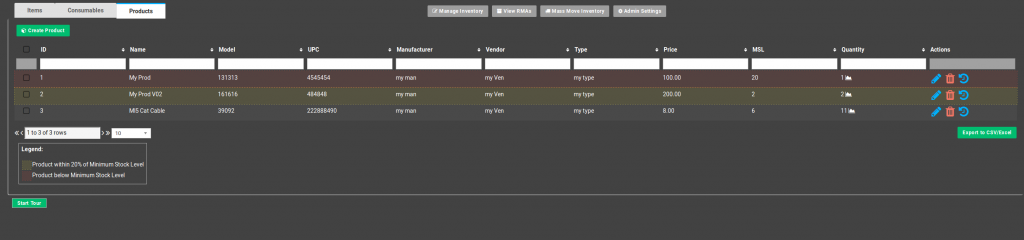
Products Tab
Under the Products tab on the Inventory page you will see a list of all Products currently existing in your instance of Powercode.
To create a new Product click Create Product under the Products tab. You will be asked to enter the following Product information:
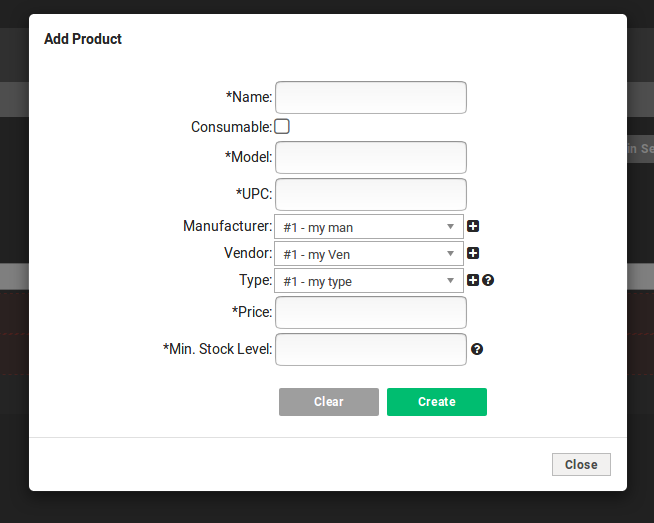
Name: Product name
Consumable: Consumables are commodity Items sold in bulk rather than individually. They can be found under the Consumable Tab. All other Products are found individually under the Product Tab.
Unit: (Consumable only) This is the number of individual Products that constitute one unit. For example 12 screws, or two tie-downs.
Model, UPC: Identifying information for each Product.
Manufacturer, Vendor: Identifying information for each Product. Additional options can be added with the + icon.
Type: The larger category this Product belongs to (ie. access points, routers).
Price: Unit cost.
Min Stock Level: This Product on the Products tab will be highlighted with yellow within 20% of the minimum stock value. A warning email will be sent upon reaching the Min Stock Level. By clicking the Admin Settings button on this page you can set the email address that stock level notifications are sent to.
The Inventory Products Tab is shown below. My Prod is below the minimum stock level and My Prod V02 is within 20% of the minimum level.
You may delete or edit Products with the pencil and trash can icons to the right of the Product’s column.
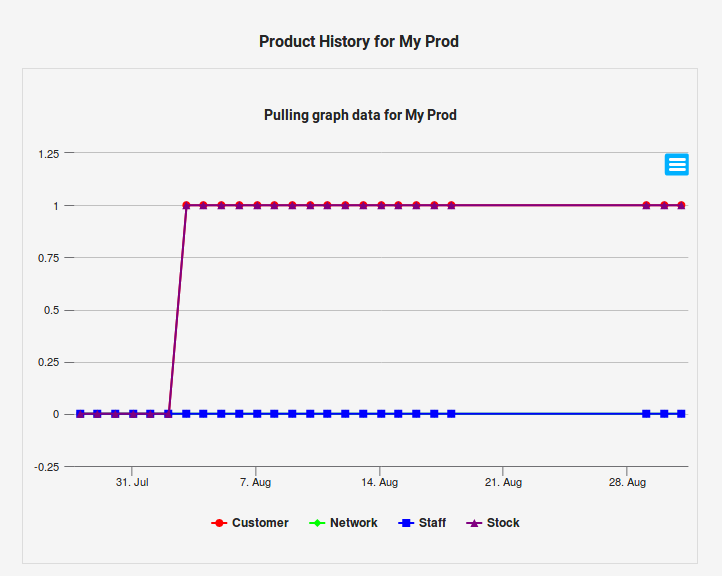
Product History
The graph icon to the far right of the Inventory Product will display the historical distribution of that product. By clicking the hamburger menu at the top right of the graph dialog you can print or export this information to variety of file types.