
Many of the configuration items needed to set up VoIP, specifically the CDR Records can be found under Items > Voice Services. But first you need a VoIP Service.
Create a Service
VoIP Services allow you to sell voice services in Powercode, rate CDRs and track customer calls. To do so, you must first create VoIP Services and associate them with customers.
These can be created like any other service under Items > Services.
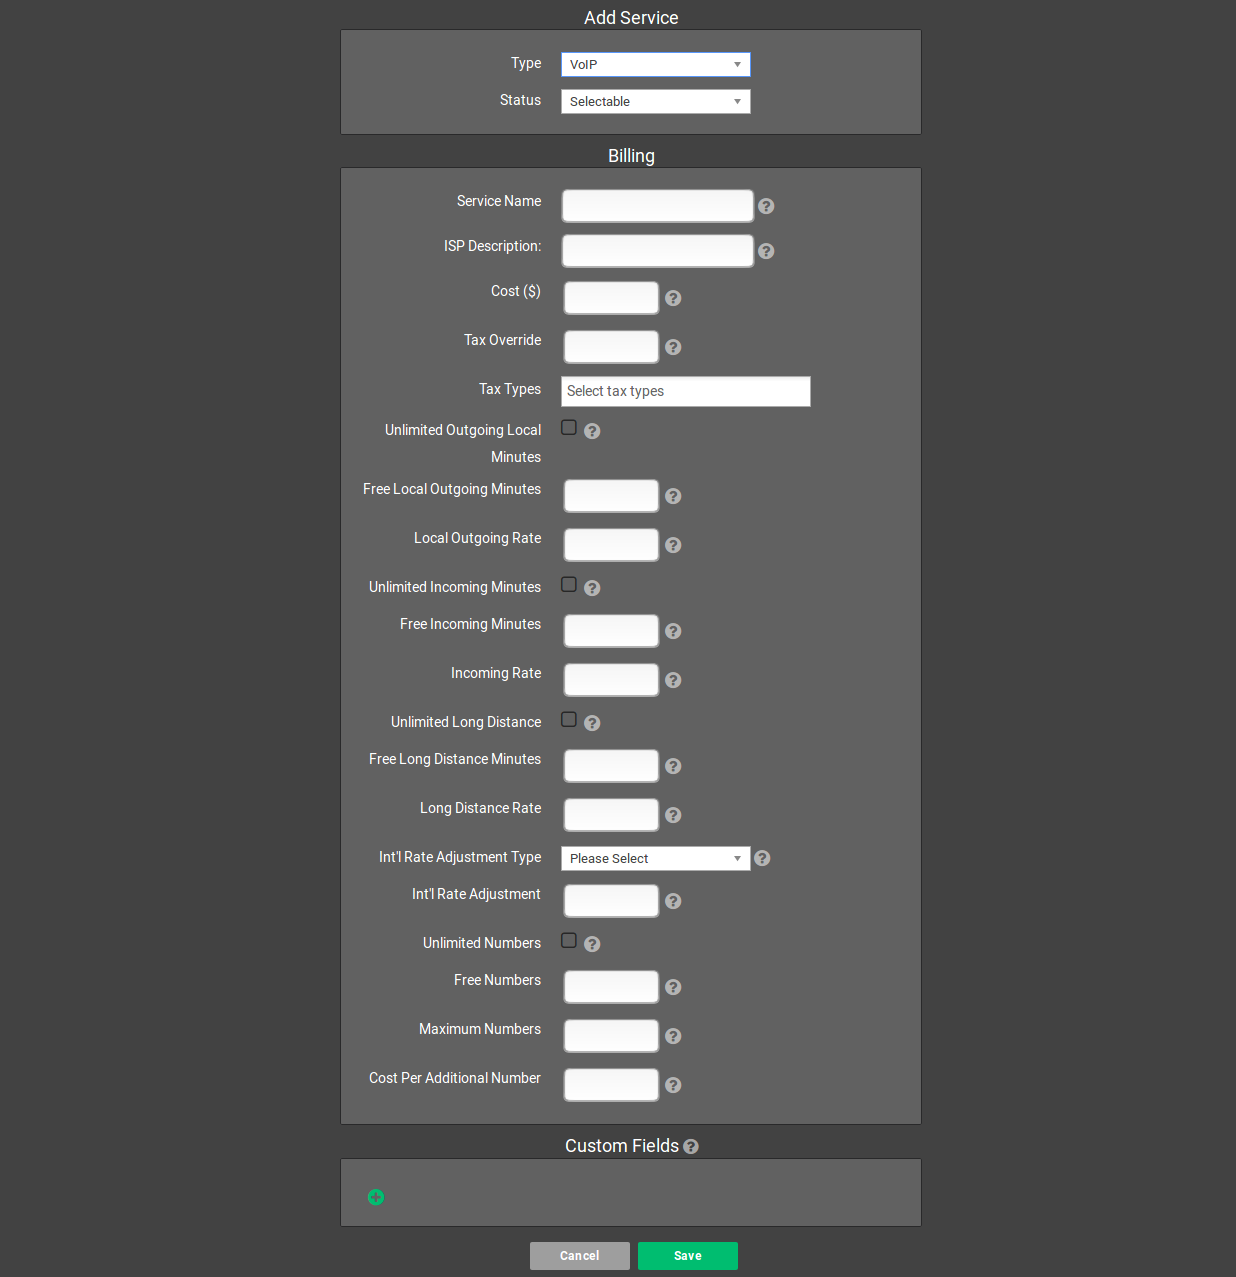
Standard service items including Service Name, ISP Description, Cost, Tax Override and Tax Types are described on the Services page.
Items unique to VoIP billing:
- Unlimited Local Minutes: Check this if this service should have unlimited local calls.
- Free Local Minutes: If local minutes are not unlimited, enter the number of local minutes allowed by this service here.
- Local Rate: For non-free local minutes, enter the rate to charge.
- Unlimited Long Distance: Check this if this service should have unlimited long distance.
- Free Long Distance Minutes: If long distance minutes are not unlimited, enter the number of long distance minutes allowed by this service here.
- Long Distance Rate: For non-free long distance minutes, enter the rate to charge.
- Int’l Rate Adjustment Type: For international calls, do you wish to charge a percentage increase over your base international rates or a flat rate increase?
- Int’l Rate Adjustment: Enter the percentage of the amount in currency you wish to charge over (or less than in the case of negative numbers) your base international rate.
- Unlimited Numbers: Is this service allowed to have unlimited DIDs?
- Free Numbers: If this service is not allowed unlimited DIDs, how many DIDs can this service have for free?
- Maximum Numbers: What is the maximum number of DIDs this service can have?
- Cost Per Additional Number: For every DID over the free numbers amount but below or equal to the maximum numbers amount, how much should be charged per month for that DID?
DIDs
You will need to import DIDs into Powercode before customers can be assigned numbers. These can be found under Items > Voice Services > DIDs.
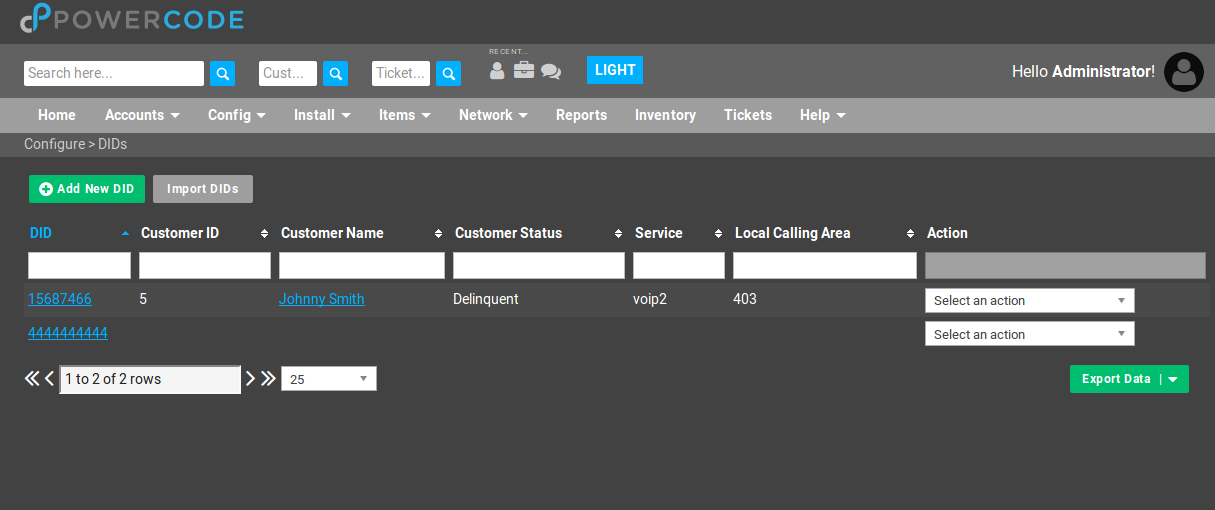
From here you can either add DIDs manually one at a time or import them from a .csv with the Import DIDs button. Powercode will tell you what format the .csv file must be in.
CDR Records
CDR Records are used to calculate the amount that your clients would get billed for minutes. If you set up auto-CDR import, then the cdr files will add to the account daily.
Setting up Auto CDR Import is the best way to do this if you want Powercode to handle the billing.
You will need to create a CDR Format to match the format of the .CSV files containing call log information that you will be importing into Powercode. CDR Formats can be found under Items > Voice Services > CDR Formats.
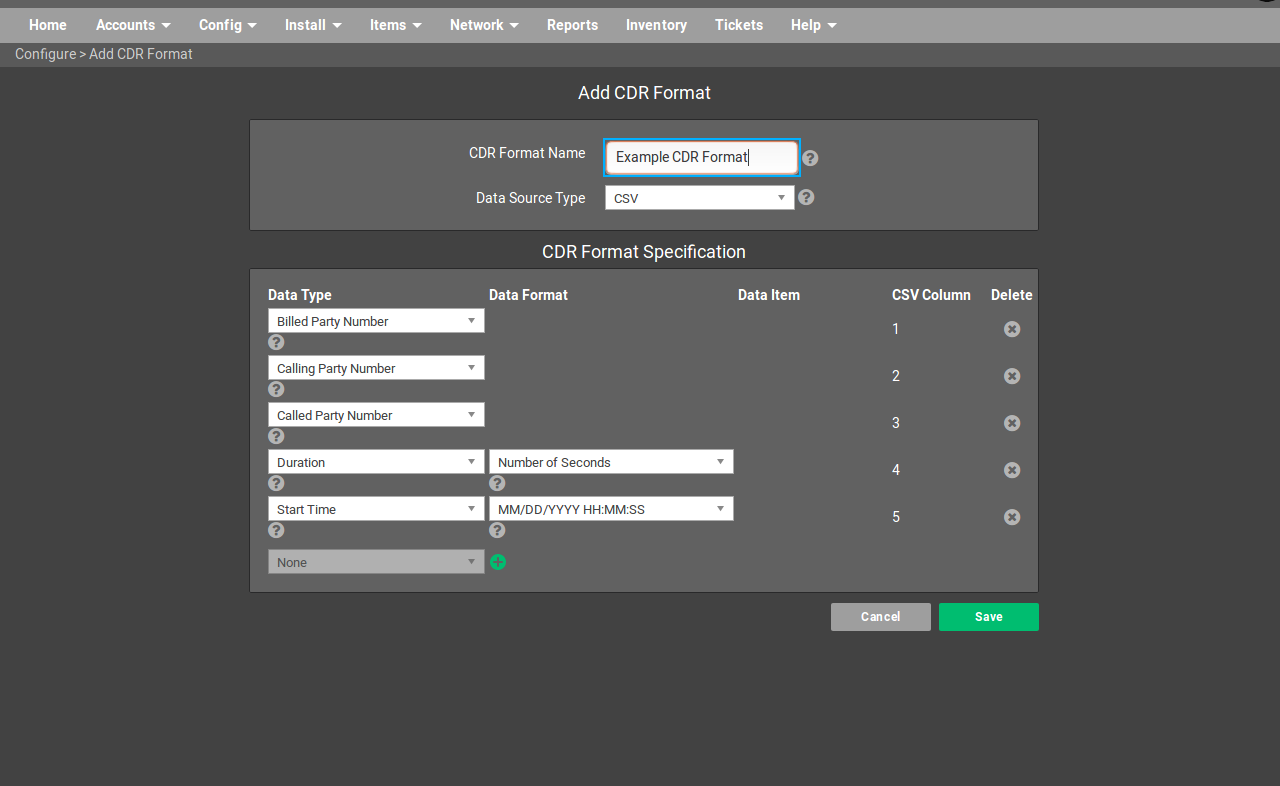
Once you select a CDR Format Name and Data Source Type (currently .csv is the only supported type) you can add a row for each of the items you will need Powercode to process into the system.
You can then set up your Auto CDR Import at Items > Voice Services > CDR Import.
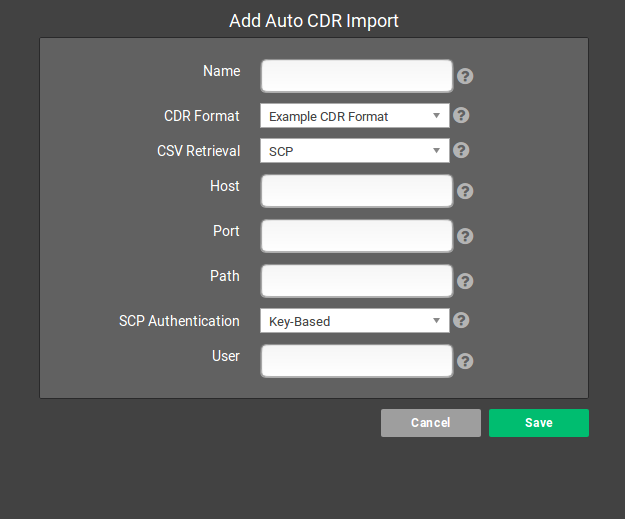
Choose the corresponding CDR Format and enter the credentials and addresses for the CDR transfer. We suggest using ftp or ssh once from the billing server to the CDR source machine and in the opposite direction so the server path is verified.
You may also wish to ask Powercode support to verify that you have a working connection.
Should you need to manually import CDR items it is possible to do so under Items > Voice Services > Manual CDR Import. Do be aware that calls are rated during billing and thus minutes will not be charged for a billing period if the manual import is not present on the system before 3:00 a.m. for the previous day.
Adding the Service to Customers
Once a VoIP Service is set up you may add a VoIP Service to a customer account like any other service. You will also need to add a DID, which is essentially a VoIP phone number, to that account and choose the local calling area. Your customer should now be set up with a working VoIP Service.